Remove vocals from a song in 4 steps:
- Install the OpenVINO AI plugin (Windows/Linux)
- Import your song (File → Import → Audio)
- Go to Effect → OpenVINO AI Effects → Music Separation
- Choose "2 stem – Vocal and Instrumental" → Apply
What Is Vocal Removal?
Vocal removal is the process of separating or eliminating the lead vocals from a mixed audio track, leaving only the instrumental backing. The resulting instrumental track can be used for karaoke, practice, remixes, or any scenario where you want the music without the original singing.
Audacity offers three distinct approaches: an AI-powered Music Separation plugin (the most accurate), a built-in Vocal Reduction and Isolation effect, and a manual stereo inversion technique for center-panned vocals.
How to Remove Vocals in Audacity
Method 1: AI Music Separation (Recommended)
The OpenVINO AI Music Separation plugin delivers the best quality results by using a deep learning model to intelligently separate stems. It is available on Windows and Linux via the free OpenVINO plugin package.
Step 1: Install OpenVINO Plugin
Download the OpenVINO AI plugin package from the MuseHub or from the OpenVINO Audacity GitHub page. Run the installer and restart Audacity. The plugin will appear under Effect > OpenVINO AI Effects.
Step 2: Import Your Song
Open Audacity and go to File > Import > Audio (or press
Ctrl + Shift + I / Cmd + Shift + I on Mac). Select your
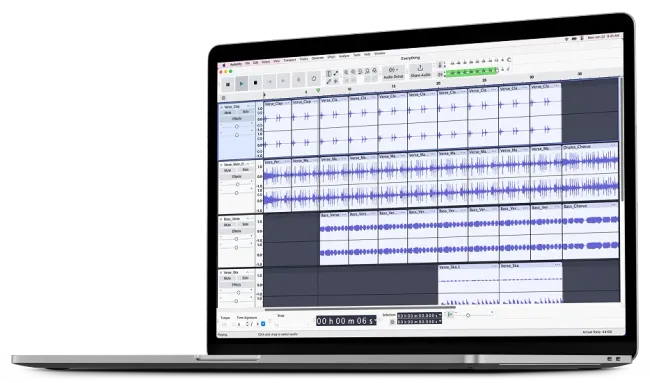
audio file and click Open. The track will appear as a
stereo waveform in the Audacity workspace.
Step 3: Apply Music Separation
With the track loaded, select all audio (Ctrl + A /
Cmd + A). Navigate to Effect > OpenVINO AI Effects > Music Separation. In the dialog, choose your desired separation mode – 2-Stem (Vocals + Instrumental) for standard karaoke or 4-Stem for full stem separation. Click
Apply and wait for processing to complete (typically 1–3 minutes
depending on song length and hardware).
Step 4: Export Your Tracks
Once processing finishes, Audacity will create separate tracks for each stem. Mute or delete the vocal track, then export the instrumental via File > Export Audio. Choose your preferred format (WAV for lossless quality, MP3 for smaller file size) and click Save.
Method 2: Vocal Reduction and Isolation Effect
Audacity includes a built-in Vocal Reduction and Isolation effect that works on all platforms – including Mac. It uses phase cancellation and frequency filtering to reduce center-panned vocals. Results vary depending on the recording, but it requires no extra plugins.
Step 1: Import Audio
Import your song via File > Import > Audio. The track must be stereo for this method to work – if it shows as mono, this method will not produce useful results.
Step 2: Select Track
Click on the track header to select the whole track, or press
Ctrl + A / Cmd + A to select everything.
Step 3: Apply Effect
Go to Effect > Special > Vocal Reduction and Isolation. The dialog will open with several action modes. Choose Remove Vocals to subtract the center channel, or Isolate Vocals to extract only the vocals.
Step 4: Adjust Settings
Use the Strength slider to control how aggressively the center channel is removed. The Low Cut and High Cut frequency fields let you restrict the removal to the vocal frequency range, preserving bass and high-frequency content. Click Preview to audition the result, then Apply when satisfied.
Method 3: Manual Stereo Inversion
This is a legacy technique that works by inverting one stereo channel and mixing the two channels together, cancelling any audio that is identical in both channels (typically center-panned vocals). It is the least reliable method – it only works on vocals that are perfectly centered and can remove other center-panned elements like bass and kick drum.
- Import your stereo track and click the track name → Split Stereo to Mono to create two separate mono tracks.
- Select the lower (Right channel) track and go to Effect > Special > Invert.
-
Select both tracks (
Shift + clickthe second track header), then go to Tracks > Mix > Mix and Render to New Track. - The new mono track should have significantly reduced vocals. Export via File > Export Audio.
Separation Modes Explained
2-Stem (Vocals + Instrumental)
The 2-stem mode produces two output tracks: one containing the isolated vocals and one containing everything else (the instrumental). This is the fastest option and works well for karaoke track creation, extracting acapella versions, or recording new vocals over a backing track. Processing time is roughly half that of 4-stem.
4-Stem (Vocals + Drums + Bass + Other)
The 4-stem mode separates a song into four individual components: vocals, drums, bass, and everything else (guitars, keys, synths, etc.). This gives you maximum creative control: reconstruct a mix without a specific instrument, create drum-only practice loops, or use individual stems for DJ sets and remixes. Processing takes proportionally longer and benefits from a faster CPU or GPU.
Settings Reference
The following settings apply to the Vocal Reduction and Isolation effect (Method 2). The OpenVINO AI plugin handles settings automatically.
Strength
Controls the degree of center-channel removal, from 0 (no effect) to 1 (maximum removal). Higher values eliminate more of the center signal, including vocals, but may also reduce bass and other centered elements. Start at 1.0 and reduce if the instrumental sounds thin or hollow.
Low Cut for Vocals
Frequencies below this threshold (in Hz) are left untouched, even if they are center-panned. Setting a value of around 120 Hz preserves the kick drum and bass guitar, which are often centered in a stereo mix, giving a more natural-sounding instrumental.
High Cut for Vocals
Frequencies above this threshold are similarly excluded from the removal process. Setting this to 8000 Hz or higher allows cymbals and air frequencies to pass through unaffected. Vocals typically occupy the 200– 4000 Hz range, so values above that are safe to preserve.
What Can You Create?
What you can create:
- Karaoke tracks – Remove vocals to sing along to your favorite songs
- Acapella versions – Isolate vocals for use in remixes or mashups
- Practice tracks – Learn an instrument part without vocals competing for attention
- DJ stems – Separate drums, bass, and vocals for live mixing and performance
- Covers – Create a clean backing track so you can record your own vocal performance
Supported Audio Formats
Supported audio formats:
Import: MP3, WAV, FLAC, OGG, AIFF, M4A, WMA, AC3
Export: MP3, WAV, FLAC, OGG, AIFF
For the best separation quality, use a lossless source file (WAV or FLAC) rather than a compressed MP3, which may contain compression artifacts that affect the AI model.
Limitations & What to Expect
What to expect:
- AI separation works best on studio-quality recordings
- Backing vocals and reverb tails may remain partially audible
- Live recordings are harder to separate cleanly
- Manual stereo inversion only works if vocals are center-panned in the mix
- The OpenVINO AI plugin currently supports Windows and Linux only
Tips for Best Results
- Use a lossless source file (WAV or FLAC) as your input rather than MP3 – MP3 compression artifacts can reduce separation quality.
- For the AI method, a faster CPU or GPU significantly reduces processing time. Enable GPU acceleration if your system supports it.
- If residual vocals remain, try applying Noise Reduction or a narrow Notch Filter at the vocal frequencies to further attenuate them.
- When using the manual inversion method, do not normalize or apply any effects before splitting – both channels must be at identical levels for cancellation to work correctly.
- Use the 4-stem mode if you plan to rebuild the mix – having individual stems gives you far more flexibility than the 2-stem output.
Troubleshooting
"OpenVINO AI Effects" does not appear in the Effect menu.
Ensure the OpenVINO plugin was installed and that Audacity was fully restarted
after installation. On Windows, check that the installer ran with administrator
privileges. On Linux, verify the plugin is installed to the correct Audacity plug-ins
directory.
Processing appears to hang or takes very long.
AI separation is CPU-intensive. A 3-minute song may take 5–10 minutes on older
hardware. Check Task Manager (Windows) or Activity Monitor (Mac) to confirm Audacity
is still using CPU. Avoid running other heavy applications during processing.
Vocals are still clearly audible after applying the effect.
For Method 2, verify the source track is stereo and that the vocals are center-panned.
A mono source or vocals mixed off-center will not respond well to phase cancellation.
Switch to the OpenVINO AI method (Windows/Linux) for better results on difficult
material.
The exported file sounds distorted or clipped.
After applying effects, open View > Mixer Board and check
that the track gain is not above 0 dB. Apply
Effect > Volume and Compression > Normalize to bring peaks
to −1 dBFS before exporting.
Frequently Asked Questions
Is Audacity's vocal remover really free?
Yes, 100% free with no limits, subscriptions, or credits required. Audacity is
open-source software and the OpenVINO AI plugin is also free.
Which method gives the best results?
The OpenVINO AI Music Separation plugin provides the best quality by a wide margin.
If you are on Windows or Linux, use it over the manual methods whenever possible.
Can I remove vocals on Mac?
The OpenVINO AI plugin is currently Windows and Linux only. Mac users can use
the built-in Vocal Reduction and Isolation effect, though results
will vary depending on how the song was mixed.
Why are some vocals still audible after removal?
Backing vocals, reverb tails, and stereo-widened vocal effects spread sound across
both channels, making perfect removal impossible. AI models handle these cases
better than manual methods but cannot guarantee a completely clean result.
Can I isolate drums or bass separately?
Yes. The OpenVINO plugin offers a 4-stem mode that produces separate vocal, drum,
bass, and "other" stem tracks from a single audio file.
What audio quality should I use for best results?
Use lossless formats (WAV or FLAC) as your source material. MP3 compression introduces
artifacts that can negatively affect AI separation accuracy.
Is it legal to remove vocals from songs?
For personal, non-commercial use this is generally acceptable in most jurisdictions.
Commercial use of the separated audio requires permission from the copyright holder.
Always check the licensing terms for content you did not create.
How long does processing take?
AI separation typically takes 1–3 minutes per song depending on your hardware.
A modern CPU will process a 4-minute track in about 90 seconds; older hardware
may take up to 10 minutes.
Why Choose Audacity for Vocal Removal?
| Feature | Audacity | Online Tools |
|---|---|---|
| Price | 100% Free | $7–15/month |
| File limits | Unlimited | 10–90 min/month |
| Upload size | Unlimited | 200 MB–2 GB |
| Privacy | Works offline | Upload required |
| Output formats | WAV, MP3, FLAC, OGG | Limited |
Download Audacity Free
Ready to create karaoke tracks, isolate stems, or build the perfect remix? Download Audacity for free on Windows, macOS, or Linux.