First steps
Basic audio editing
Select a stretch of audio, then trim, split, move or delete it, and undo anything you get wrong.
Before you start
You need a track with some audio in it. If you have not got one yet, make your first recording, or import an existing file: drag it onto the Audacity window, or use File → Import. Either way the audio arrives as a clip on its own track.
Clips
Everything you recorded lives inside a clip: a block of audio sitting on a track. Recording and importing both create clips. Nearly all spoken-word editing is clip work: trim the ends, split out a mistake, slide what’s left together.
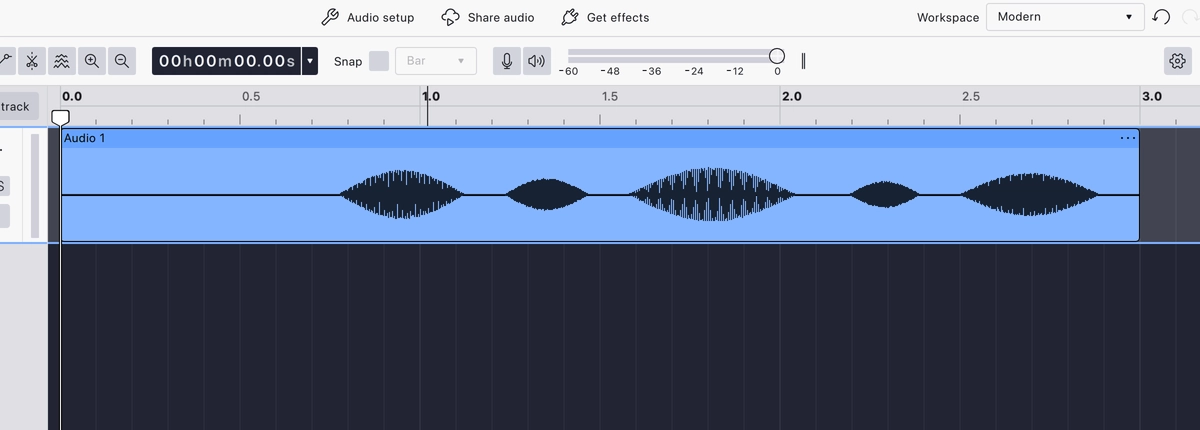
The waveform inside the clip is worth learning to read: the taller the shape, the louder that moment, and a thin spike standing on its own is usually a click, a clap or a knock. With a little practice you can find your way around a recording by eye, faster than by listening through it.
Selecting and moving clips
Select a clip by clicking its header, the strip along the top, or by double-clicking in its body. A selected clip shows two pairs of handles at its edges: the top pair trim the clip, and the lower pair, marked with a clock icon, change its speed.
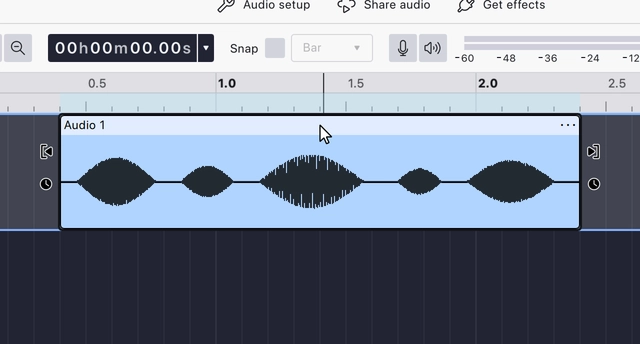
With a clip selected, hold Shift and click another clip on the same
track: both are selected, along with every clip between them. Hold
Move a clip by dragging it by its header: along its track, onto another track, or into the empty space below the tracks, which creates a new track to hold it. Dragging inside the body of the clip does something different: it makes a time range selection.
Trim and stretch
The top pair of handles trim. Hover one and the pointer changes to the trim cursor; drag the clip’s left or right edge inwards to shorten it.
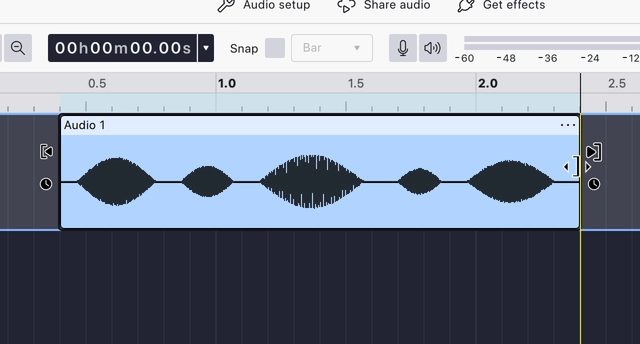
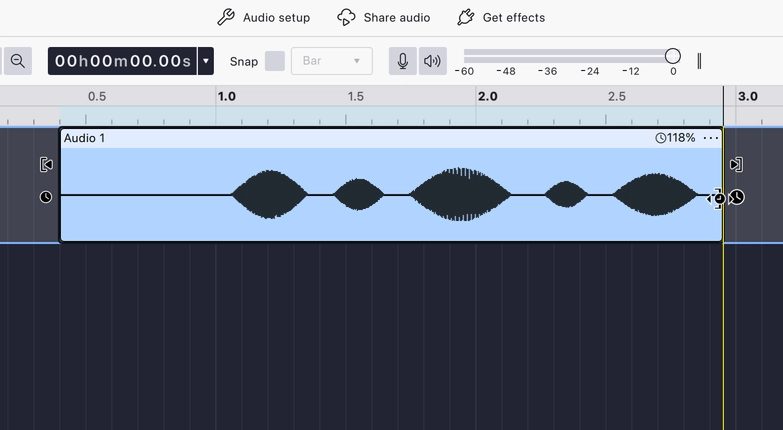
The lower pair of handles, the ones marked with a clock, change the clip’s speed. Hover one and the pointer changes to the stretch cursor; drag, and the clip stretches or squeezes, playing slower or faster. A clip whose speed has been changed shows a small badge in its top corner; click the badge to type an exact percentage instead of dragging.
Pitch lives in the same place. Right-click the clip, or open its ⋯ menu, and choose Open pitch and speed dialog to shift the pitch in semitones and cents.
Time range selections
Selection is not limited to clips. A time range selection selects the audio data directly: click in the waveform and drag left or right. The selected stretch is highlighted across the track, and dragging downwards as well selects the same stretch on every track you pass over.
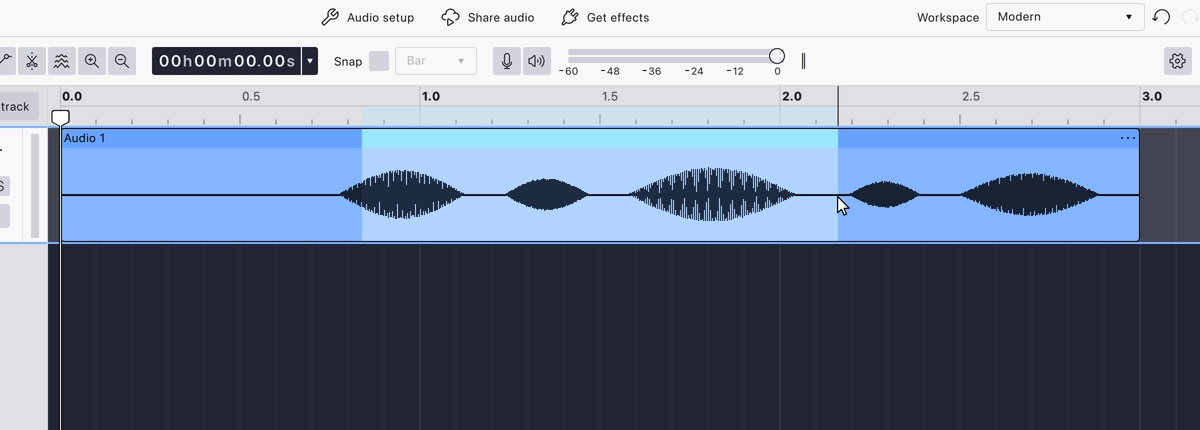
- Hold Shift and click to extend the selection you already have out to the point you clicked.
- Double-click an empty part of a track to select all of that track’s audio.
- Select → Select all, or
Ctrl+A , selects everything in the project.
Selections are easier to place precisely when you are closer in. Hold
Press Play before you edit. Playback follows the selection, so you hear exactly the stretch you are about to change. This is the quickest way to catch a selection that starts a syllable too early.
So if you made a mistake in your recording, you do not need to work in whole clips: select the mistake with a time range selection and press Delete. Which brings up a choice.
Deleting audio: leave a gap, or ripple
The first time you delete anything, a flyout appears asking which of two behaviours you want. Both are useful, and you can change your mind afterwards.
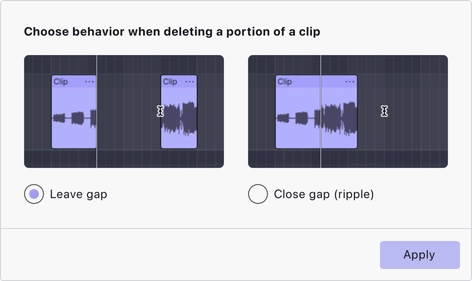
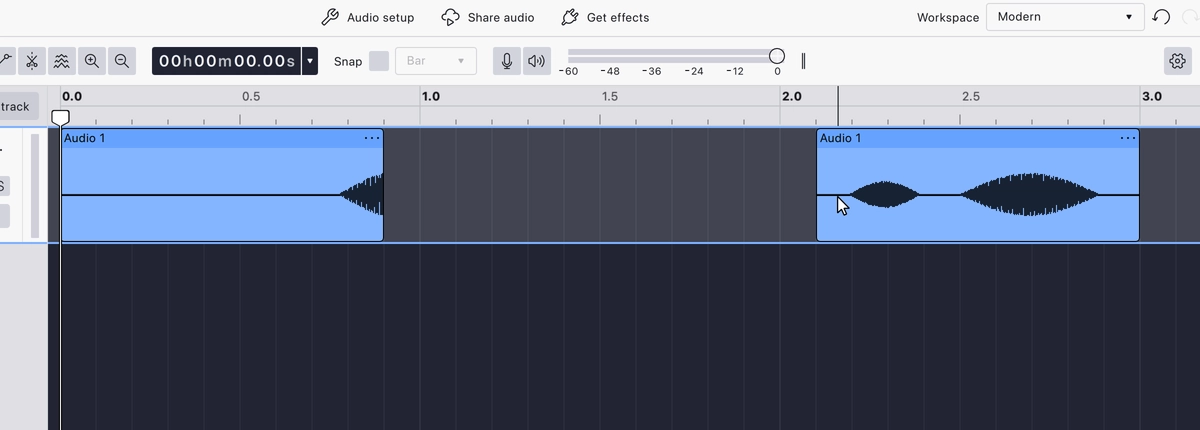
Leave a gap replaces the deleted audio with silence, and everything else stays exactly where it was. Timing across tracks is preserved, which matters when a music bed or a second voice has to stay in sync.
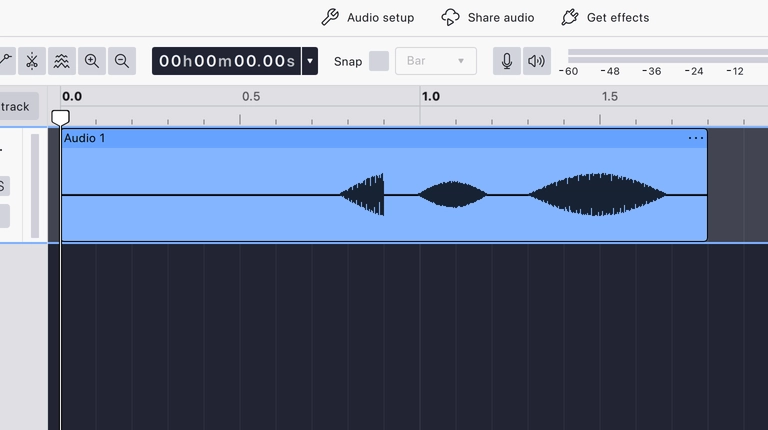
Close gap (ripple) closes the gap and everything after it slides back, so the recording gets shorter. This is what you usually want when cutting a stumble out of a single voice track.
Whichever behaviour you pick in the flyout becomes what the Delete key does, but you are not stuck with it. The alternatives stay on the keyboard:
Remove, keep or mute a stretch
Delete has two relatives that remove unwanted audio differently. The difference between the three is what happens to the timing of everything that follows.
- Delete removes the selection or the selected clip, with the gap-or-ripple behaviour above.
- Trim clip,
Ctrl+T , is the opposite of Delete: it keeps the selection and discards the rest of the clip. Use it to strip the silence off both ends of a take in one move. - Silence audio,
Ctrl+L , empties the selection without shortening it. This is what you want for a cough or a page turn in the middle of a sentence, where removing the time would ruin the rhythm.
The split tool
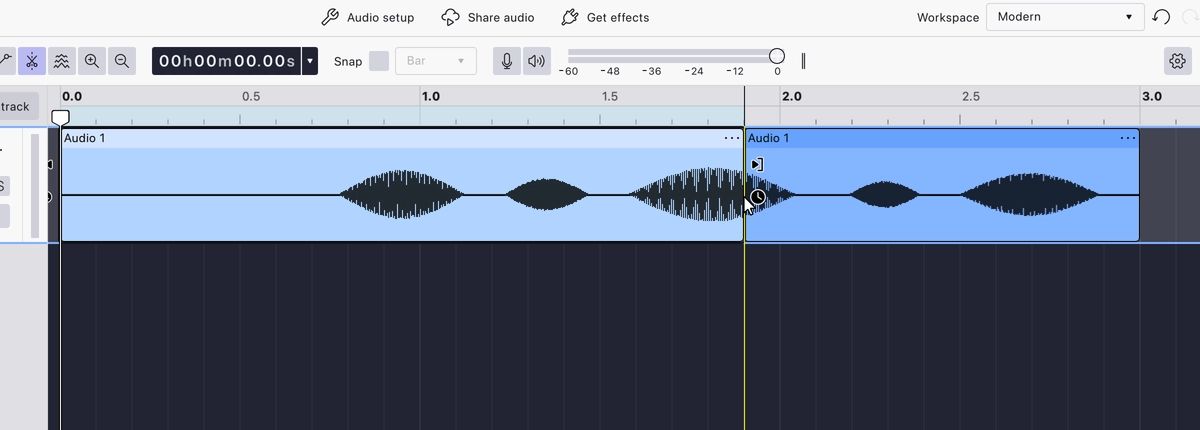
Split cuts a clip in two at a point you choose. Each half becomes a clip of its own, so you can delete, move or trim one without touching the other.
The split tool lives in the toolbar, behind the scissors button.
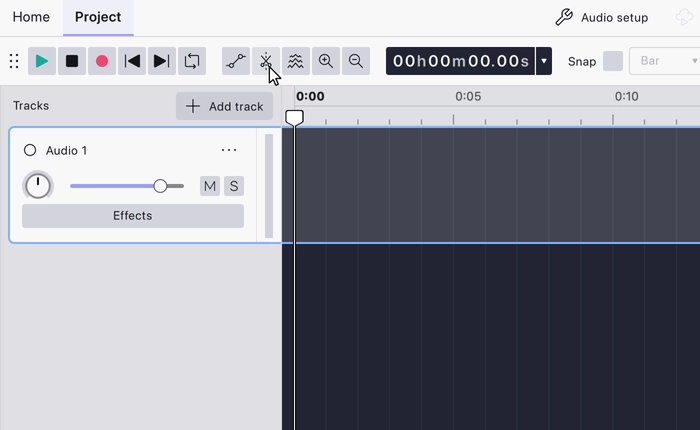
Switch it on with
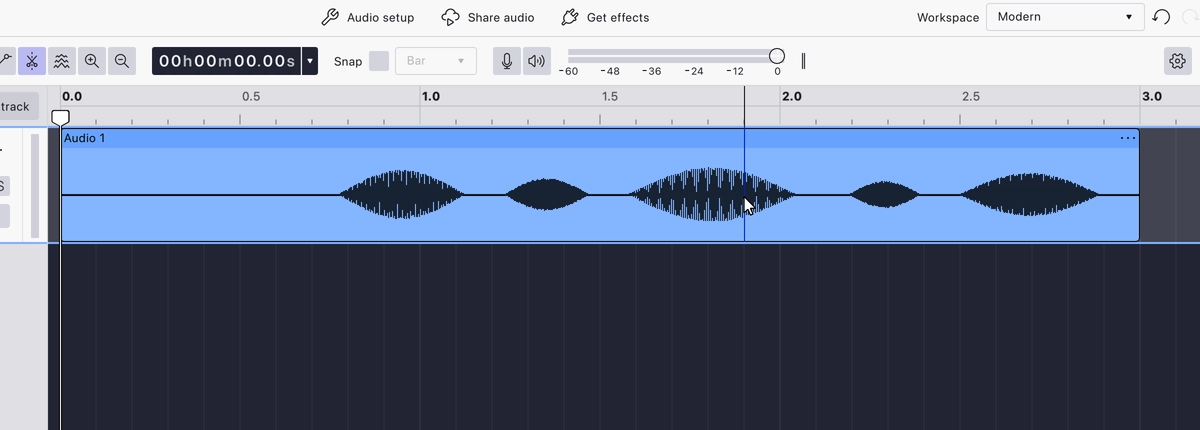
Click, and the split is applied. The portion left of the cut is selected,
ready to delete. Press
There are two more ways to make the same cut without the tool: place the
cursor where you want the cut and press
Cut, copy and paste
With a selection made, the clipboard commands work the way they do everywhere else. All three are in the Edit menu.
- Cut,
Ctrl+X , removes the selection and puts it on the clipboard. Unlike trimming, cutting takes the audio out of the track: it comes back only by pasting it, or with undo. - Copy,
Ctrl+C , takes a copy and leaves the audio alone. - Paste,
Ctrl+V , drops the clipboard in at the cursor.
Fades and volume: the clip gain tool
Fades and volume changes inside a clip are drawn rather than applied as an effect. Switch on the clip gain tool in the toolbar and you can add points along the clip and drag them to build a curve: down to nothing for a fade out, up from nothing for a fade in, or a dip under a line of speech to duck background music.
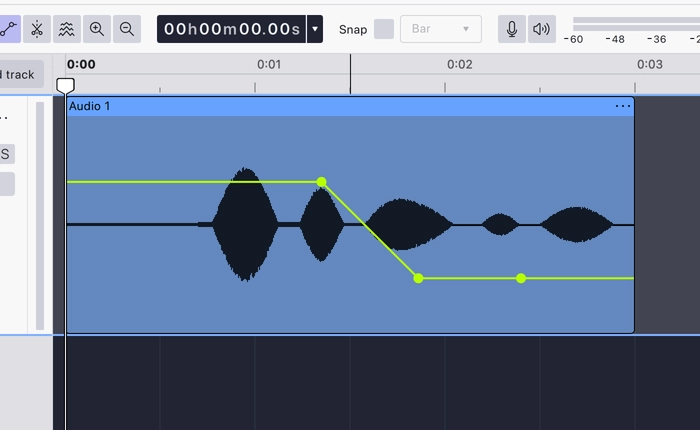
Click on the line to add a point, then drag it. The first point anchors the level on one side, and the points after it can be pulled down to a lower level for a volume drop, or all the way down for a fade out. Watch the waveform as you drag: it shrinks to match the curve, so you can see the audio getting quieter rather than having to take it on trust. Switch the tool back off when you are done, so ordinary clicks select clips again.
Snapping
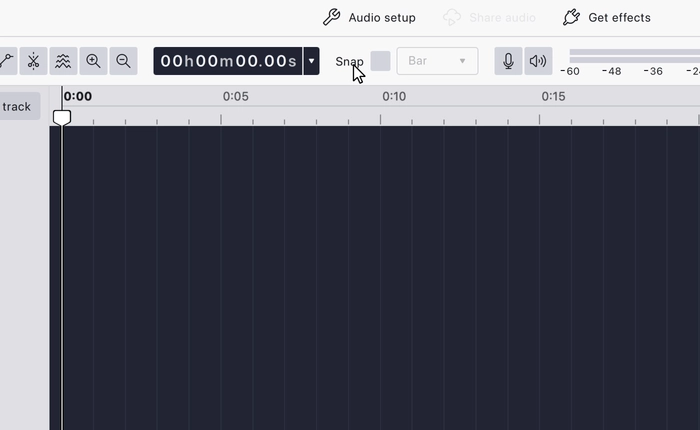
Snapping keeps your edits tidy. Tick the Snap checkbox in the toolbar and choose an interval, seconds being the easiest to work with. Everything then lands on that grid: moving clips, trimming, and making a time selection.
Undo anything
Press
Undo is what makes editing safe to explore. Try a command, listen, and undo it if it was wrong.
Next, shape the sound: apply your first effect.
Last updated