First steps
Export your audio
Mix down to a single finished file — the one you upload or send — once you're happy with the edit.
Export a file
Open File → Export audio, or press
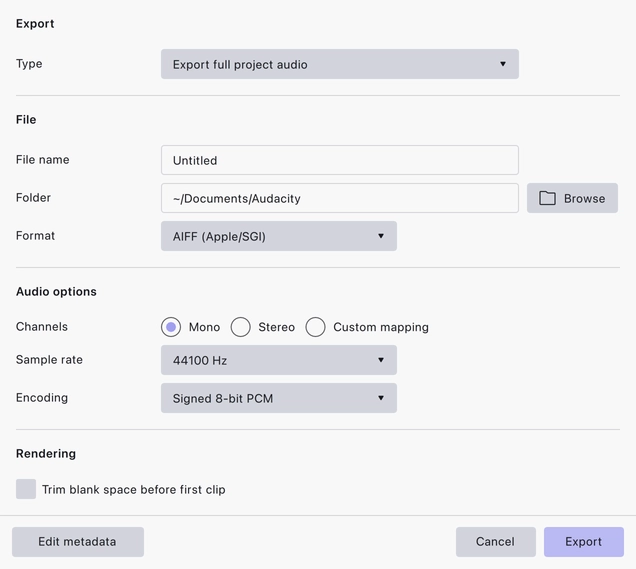
The Type dropdown at the top decides what gets exported:
- Export full project audio mixes everything in the project into the file. This is the usual choice for a finished edit.
- Export selected audio exports only the current selection. Useful for pulling one answer out of an interview, or checking how a stretch sounds in the finished format.
- Export audio in loop region exports the stretch marked by the loop region on the timeline.
Below that, name the file, choose where it goes, and pick a format. The dialog also lets you choose mono or stereo, the sample rate, and, for formats like MP3, the bit rate.
Which settings?
Your destination may have its own guidance on format, file size or loudness, and if it does, follow that. If nobody has told you otherwise, MP3 is the format everything accepts: 128 kbps is a safe default for speech, and 256 kbps for music.
Beyond that default, three tips go a long way:
- Export mono recordings as mono. Exporting a mono recording as stereo produces two identical channels and doubles the file size. Choose stereo when the project is actually stereo.
- Opus and M4A beat MP3 at the same file size, if your destination accepts them.
- FLAC and WavPack shrink WAV by up to half without losing anything — the archival choice when quality matters and MP3 will not do.
Last updated