Effects
Compressor
Run the Compressor live on a track during playback instead of applying it to the audio.
This is the same effect as Compressor in the Effect menu, added to a track’s effect stack instead of applied to its audio. The controls and what they do are identical — that page has the reference — but nothing is written back to the track: the compression happens as the project plays.
Where to find it
Click the Effects button across the bottom of the track’s control panel, or press E, then Add effect and choose Compressor.
Working with it
Because the audio is untouched, everything stays adjustable. Change the threshold while the project is playing and you hear the result immediately; bypass the effect with its power button to compare against the original; move it above or below the other effects on the track to change where in the chain it sits; take it off the stack and the track is exactly as it was.
The compression is included when you export, so there is no step at which you have to apply it.
Notes
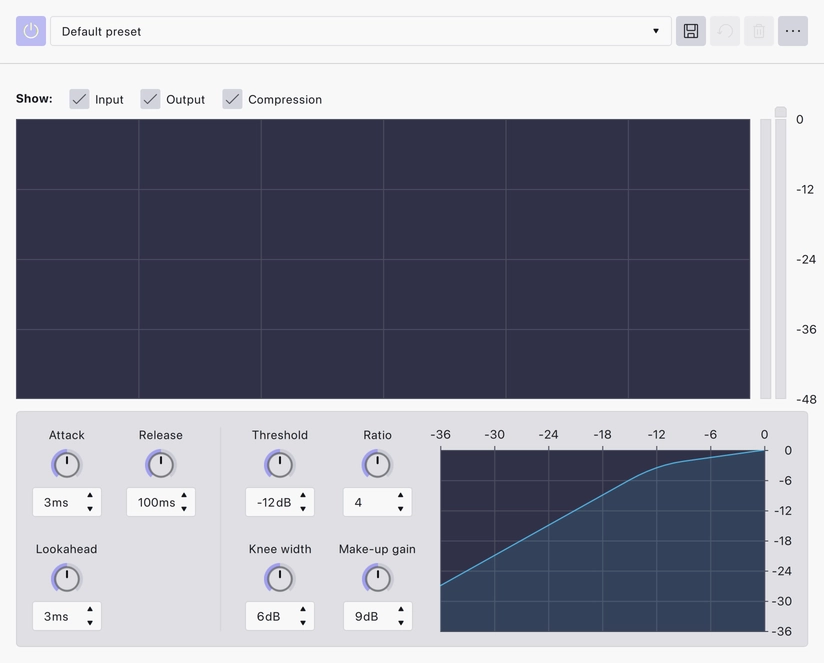
Used this way the Compressor shows a metering panel above the knobs, with Show toggles for Input, Output and Compression, so you can watch how much gain reduction is happening while the project plays. Applied destructively from the Effect menu there is nothing to meter and the panel is not shown.
Order matters. Compression before reverb tightens the source and then adds space to the result; reverb before compression pumps the reverb tail along with the signal.
See Realtime Effects for the stack as a whole.
Last updated